
初探Maven
为什么要使用 Maven?
- 添加第三方 jar 包
- jar 包之间的依赖关系
- 将项目拆分成多个工程模块
什么Maven?
Maven是一款基于Java的自动化构建工具。
构建
我们可以将未编译的Web工程比喻为一只生的鸡,编译好的Web工程是一只煮熟的鸡,编译部署的过程就是将鸡炖熟。
动态Web工程 -> 编译 -> 部署 -> 结果
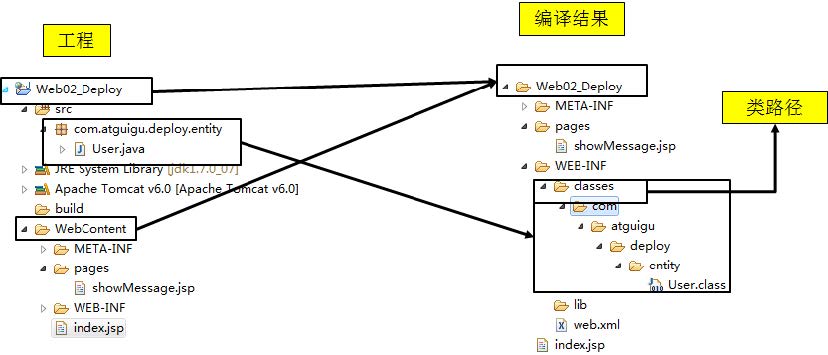
构建就是以我们编写的 Java 代码 、框架配置文件、 国际化等其他资源文件、 JSP 页面和图片等静态资源作为原材料去生产出一个可运行的项目的过程。
构建的几个环节
①清理 :删除以前的编译结果,为重新编译做好准备。
②编译 :将 Java 源程序编译为字节码文件。
③测试 :针对项目中的关键点进行测试,确保项目在迭代开发过程中关键点的正确性。
④报告 :在每一次测试后以标准的格式记录和展示测试结果。
⑤打包 :将一个包含诸多文件的工程封装为一个压缩文件用于安装或部署。 Java 工程对应 jar 包, Web工程对应 war 包。
⑥安装 :在 Mav en 环境下特指将打包的结果 jar 包或 war 包安装到本地仓库中。
⑦部署 :将打包的结果部署到远程仓库或将 war 包部署到服务器上运行。
核心概念
- POM:Project Object Model,项目对象模型。将 Java 工程的相关信息封装为对象作为便于操作和管理的模型 。Maven 工程的核心配置。可以说学习 Maven 就是学习 pom.xml 文件中的配置。
- 坐标:在Maven 的仓库中唯一 确定一个 Maven 工程。
- 依赖管理:管理项目使用jar包
- 仓库管理:你的资源位置
- 生命周期:maven构建项目的过程
- 插件和目标:执行maven构建的插件
安装
- 官网下载压缩包(.zip),这里使用3.3.9版本
- 将其解压到一个全英文无空格的文件夹下
- 子目录 bin :执行程序,主要是mvn.cmd
- conf :maven工具本身的配置文件 settings.xml
- 配置环境变量,在系统变量中添加 M2_HOME=E:\Maven\apache-maven-3.3.9
- 然后在Path中添加:%M2_HOME%\bin
- 验证:在cmd中输入
mvn -v确定即可查看版本信息。
Maven约定的目录结构
每一个maven项目在磁盘中都是一个文件夹(项目-Hello)
1 | Hello/ |
mvn compile 编译src/main目录下的所有java文件的
第一次执行会下载插件
- maven工具执行的操作需要很多插件(java类–jar文件)完成
- 下载什么东西了? jar文件–叫做插件–插件是完成某些功能
- 3)下载的东西存放到哪里了。默认仓库(本机仓库):C:\Users\(登录操作系统的用户名)Administrator.m2\repository
执行mvn compile, 结果是在项目的根目录下生成target目录(结果目录),maven编译的java程序,最后的class文件都放在target目录中。
设置本机存放资源的目录位置(设置本机仓库):
- 修改maven的配置文件, maven安装目录/conf/settings.xml,先备份 settings.xml
- 修改
<localRepository>指定你的目录(不要使用中文目录)
仓库
仓库是什么: 仓库是存放东西的, 存放maven使用的jar 和 我们项目使用的jar
- maven使用的插件(各种jar)
- 我项目使用的jar(第三方的工具)
仓库的分类
- 本地仓库, 就是你的个人计算机上的文件夹,存放各种jar
- 远程仓库, 在互联网上的,使用网络才能使用的仓库
- 中央仓库,最权威的, 所有的开发人员都共享使用的一个集中的仓库(中央仓库:https://repo.maven.apache.org )
- 中央仓库的镜像:就是中央仓库的备份, 在各大洲,重要的城市都是镜像。
- 私服,在公司内部,在局域网中使用的, 不是对外使用的。
仓库的使用,maven仓库的使用不需要人为参与。
- 开发人员需要使用mysql驱动—>maven首先查本地仓库—>私服—>镜像—>中央仓库
pom.xml
坐标:唯一值, 在互联网中唯一标识一个项目
1
2
3<groupId>公司域名的倒写</groupId>
<artifactId>自定义项目名称</artifactId>
<version>自定版本号</version>https://mvnrepository.com/ 搜索使用的中央仓库, 使用groupId 或者 artifactId作为搜索条件
packaging: 打包后压缩文件的扩展名,默认是jar ,web应用是war
packaging 可以不写, 默认是jar
依赖
dependencies 和dependency ,相当于是 java代码中import
你的项目中要使用的各种资源说明, 比我的项目要使用mysql驱动
1
2
3
4
5
6
7
8<dependencies>
<!--依赖 java代码中 import -->
<dependency>
<groupId>mysql</groupId>
<artifactId>mysql-connector-java</artifactId>
<version>5.1.9</version>
</dependency>
</dependencies>properties:设置属性
build : maven在进行项目的构建时, 配置信息,例如指定编译java代码使用的jdk的版本等
生命周期
- maven的生命周期:就是maven构建项目的过程,清理,编译,测试,报告,打包,安装,部署
- maven的命令:maven独立使用,通过命令,完成maven的生命周期的执行。maven可以使用命令,完成项目的清理,编译,测试等等
- maven的插件: maven命令执行时,真正完成功能的是插件,插件就是一些jar文件, 一些类。
单元测试
- 用的是junit, junit是一个专门测试的框架(工具)
- junit测试的内容: 测试的是类中的方法, 每一个方法都是独立测试的。方法是测试的基本单位(单元)。
- maven借助单元测试,批量的测试你类中的大量方法是否符合预期的。
使用步骤
加入依赖,在pom.xml加入单元测试依赖
1
2
3
4
5
6
7
<!-- 单元测试 -->
<dependency>
<groupId>junit</groupId>
<artifactId>junit</artifactId>
<version>4.11</version>
<scope>test</scope>
</dependency>在maven项目中的src/test/java目录下,创建测试程序
推荐的创建类和方法的提示:
测试类的名称 是Test + 你要测试的类名
测试的方法名称 是:Test + 方法名称
例子:
1
2
3
4
@Test
public void testAdd(){
测试HelloMaven的add方法是否正确
}其中testAdd叫做测试方法,它的定义规则
方法是public的,必须的
方法没有返回值, 必须的
方法名称是自定义的,推荐是Test + 方法名称
在方法的上面加入@Test
mvn compile
- 编译main/java/目录下的java 为class文件, 同时把class拷贝到 target/classes目录下面
- 把main/resources目录下的所有文件 都拷贝到target/classes目录下
IDEA中使用Maven
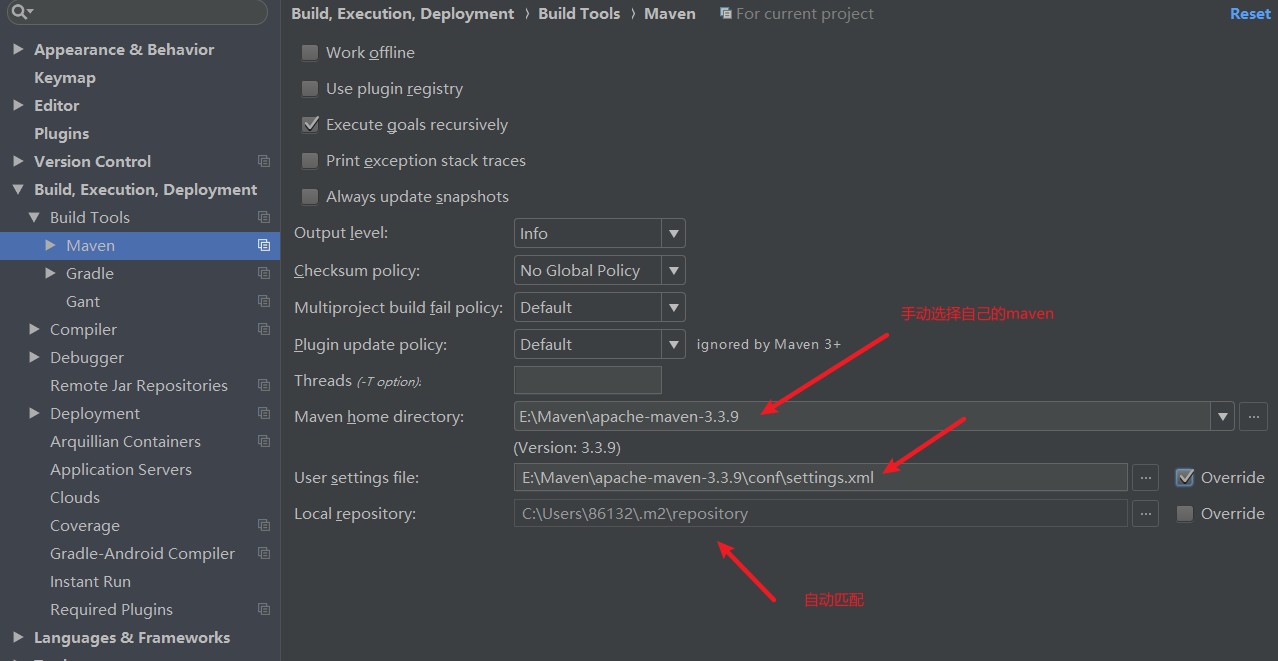
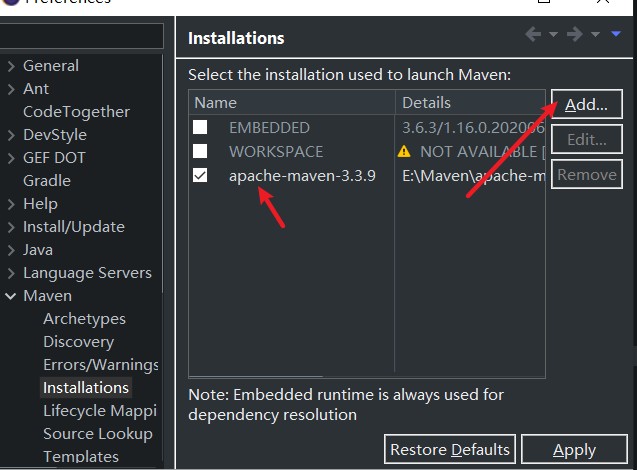
idea中内置了maven ,一般不使用内置的, 因为用内置修改maven的设置不方便。使用自己安装的maven, 需要覆盖idea中的默认的设置。让idea指定maven安装位置等信息。
配置
配置当前工程的设置file –> settings —> Build, Excution,Deployment –> Build Tools –> Maven
- Maven Home directory: maven的安装目录
- User Settings File : 就是maven安装目录conf/setting.xml配置文件
- Local Repository : 本机仓库的目录位置
配置以后新建工程的设置, file–other settings–Settings for New Project
新建java项目
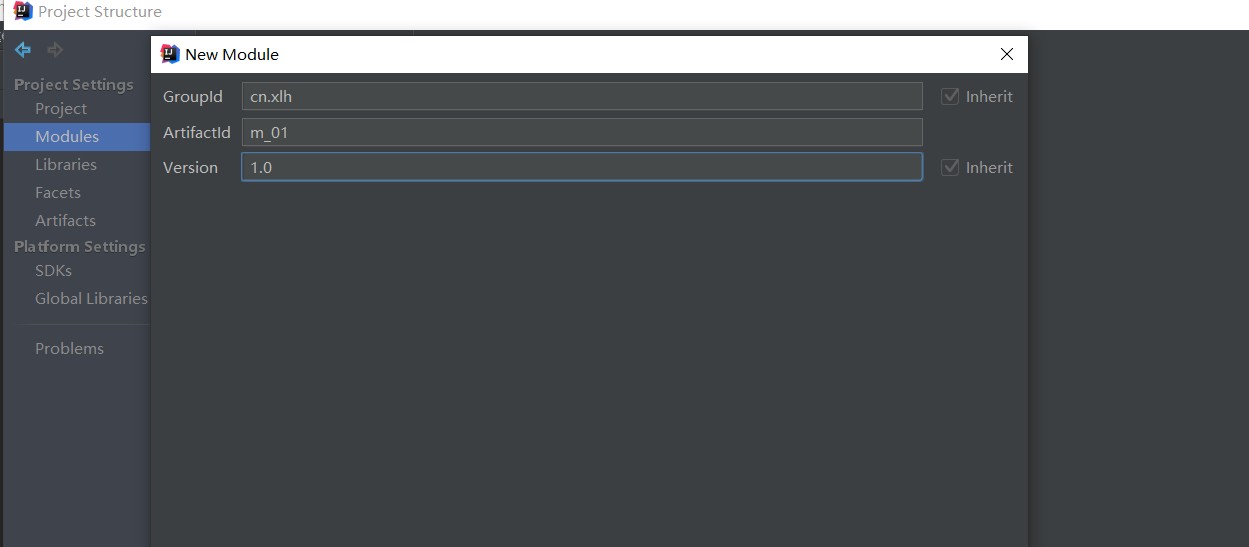
- 创建一个java项目,并选择maven模板的模块
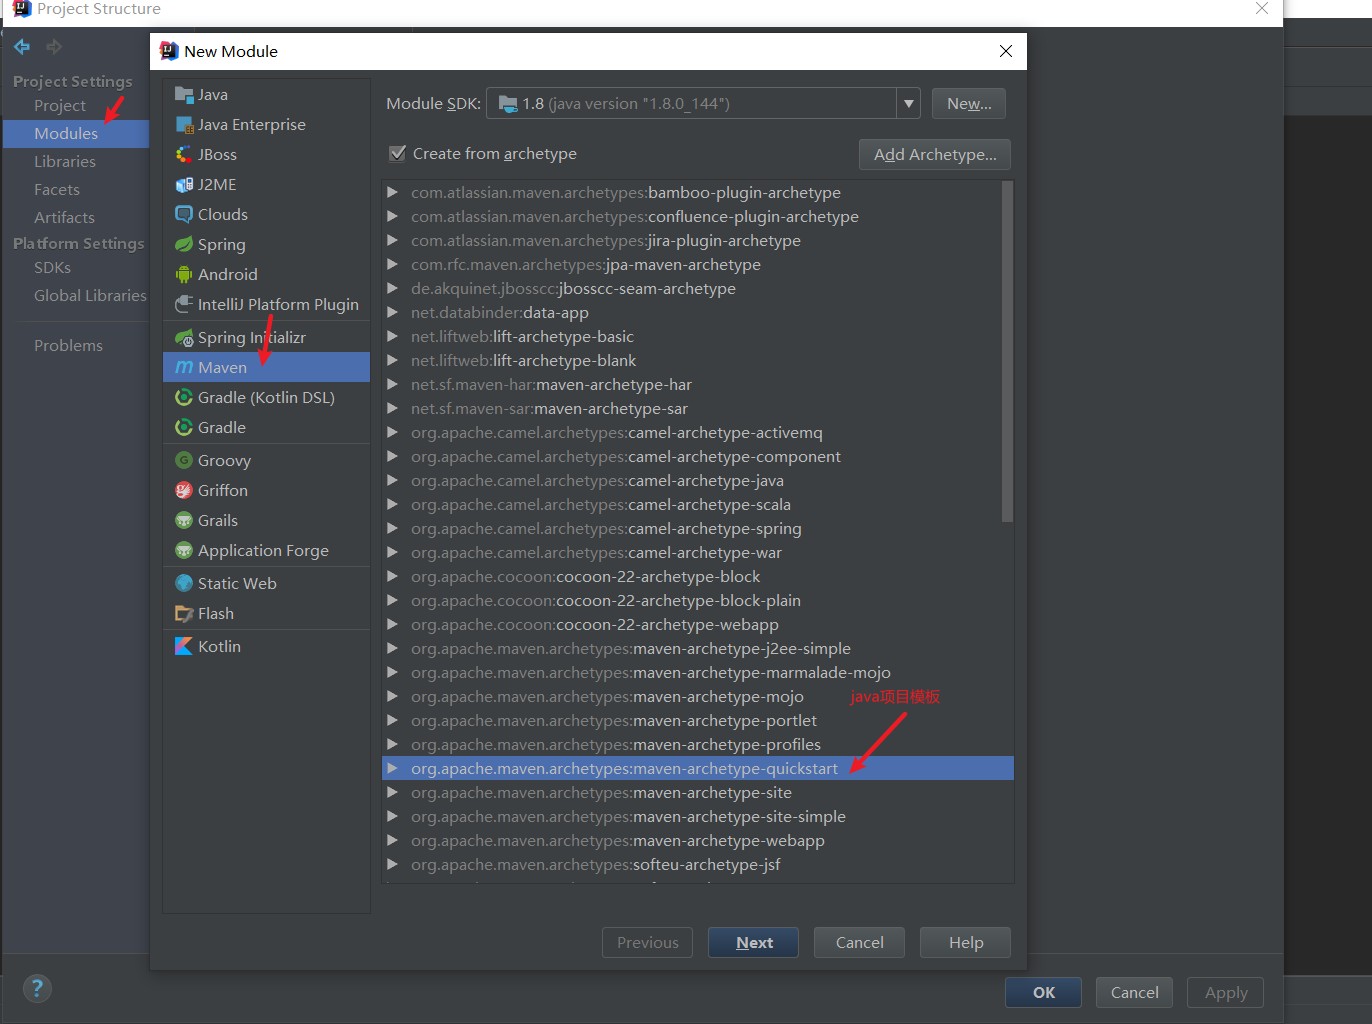
- 选择坐标
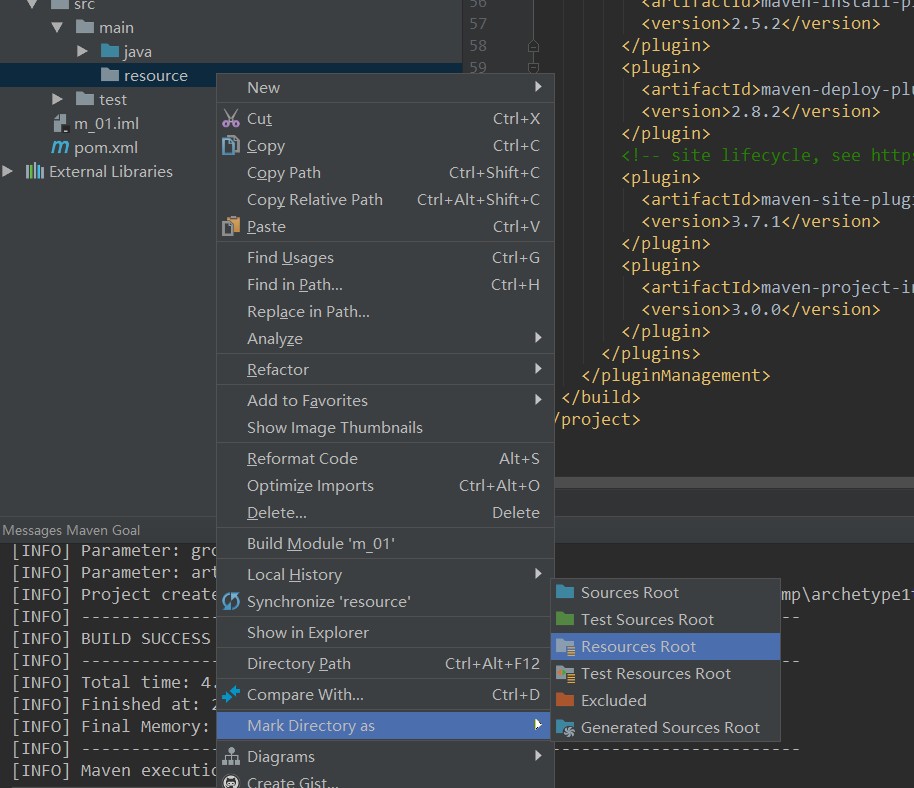
- 如有需要,创建resource文件夹,如果是普通文件夹,要设为资源文件夹。(main中是Resource Root,test中是Test Resource Root)
pom.xml结构样例
1 |
|
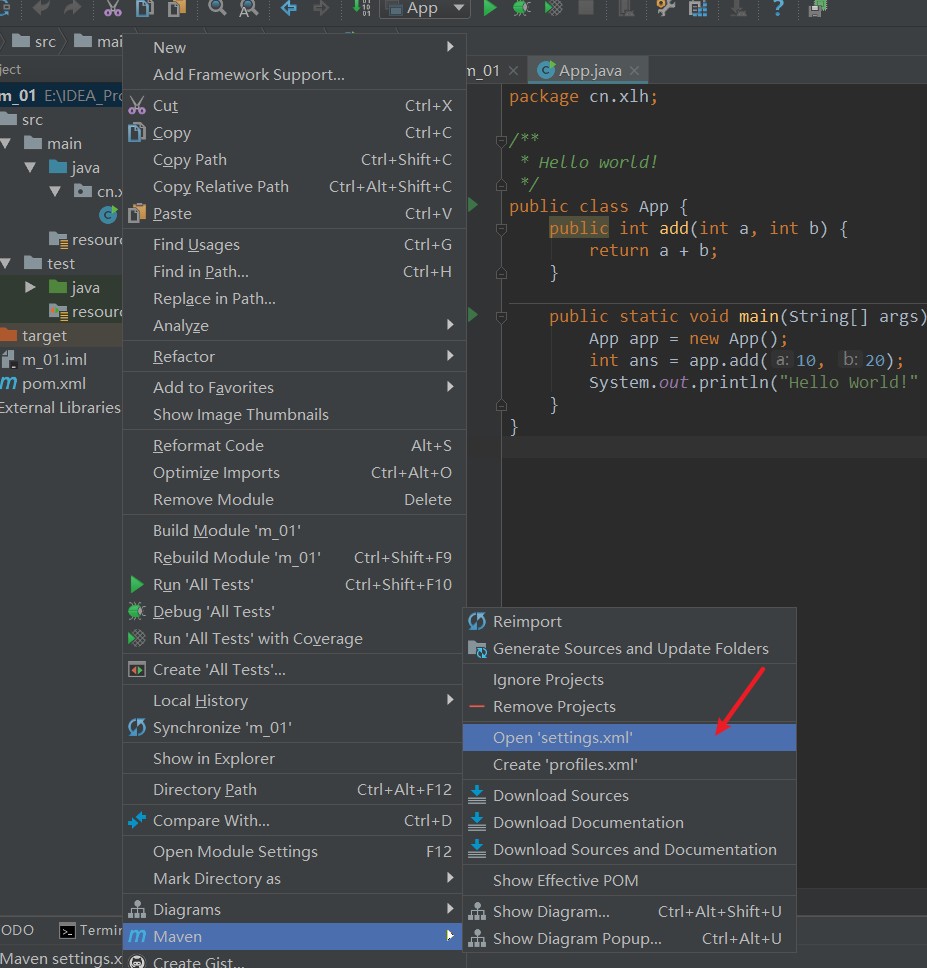
- 初次建maven项目时,可能会出现下载必要插件包很慢的情况,可以加入镜像,如在setting.xml中加入镜像代码
1 | <!-- setting.xml --> |
测试
- 在
main/java/cn/xlh/App.java中写入一个加法函数
1 | package cn.xlh; |
- 在
test/java/cn/xlh/AppTest.java写入测试代码
1 | package cn.xlh; |
- 输出结果
1 | =======测试Add方法start====== |
工具
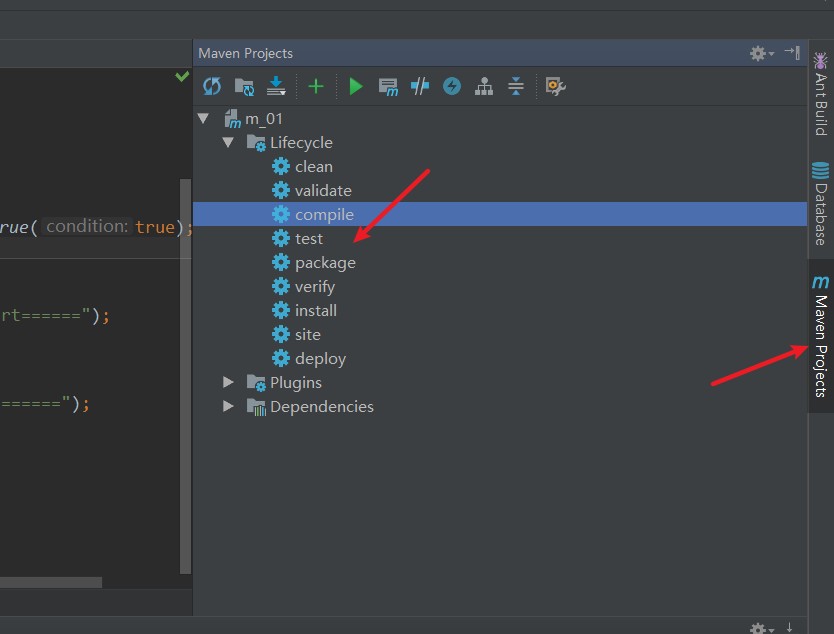
在右侧工具中,对项目进行快捷操作,如编译、测试等。
新建web项目
- 创建web模块

- 在pom.xml中加入依赖
1 | <dependencies> |
- 在
src/main/java/cn/xlh下创建Servlet(New->键盘输入servlet)
1 | package cn.xlh; |
- web.xml中加入描述
1 |
|
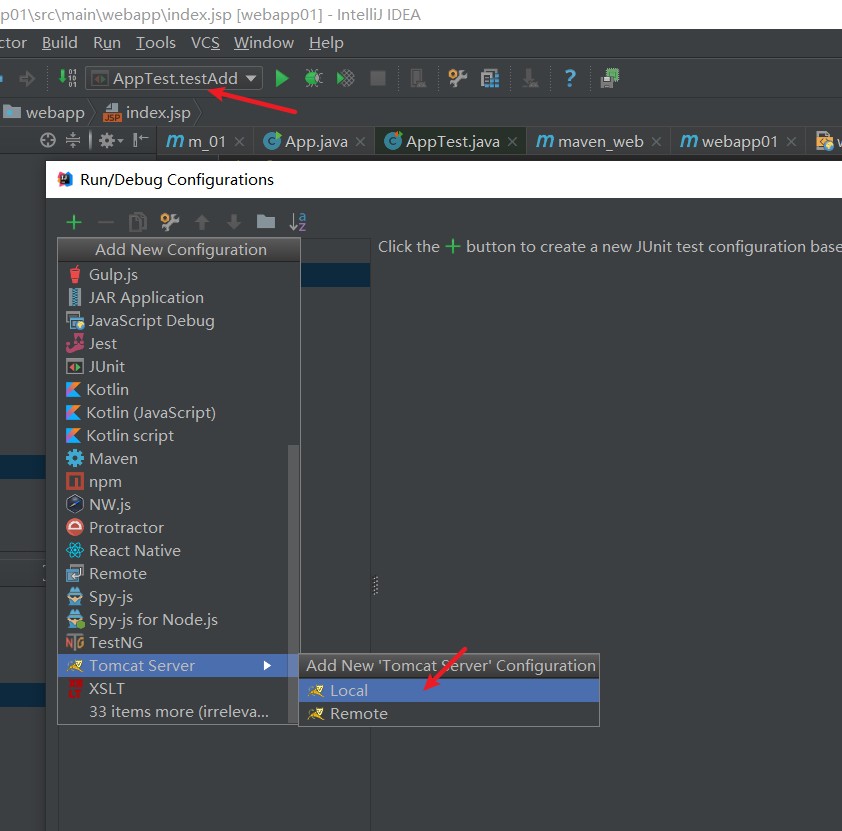
- 配置tomcat
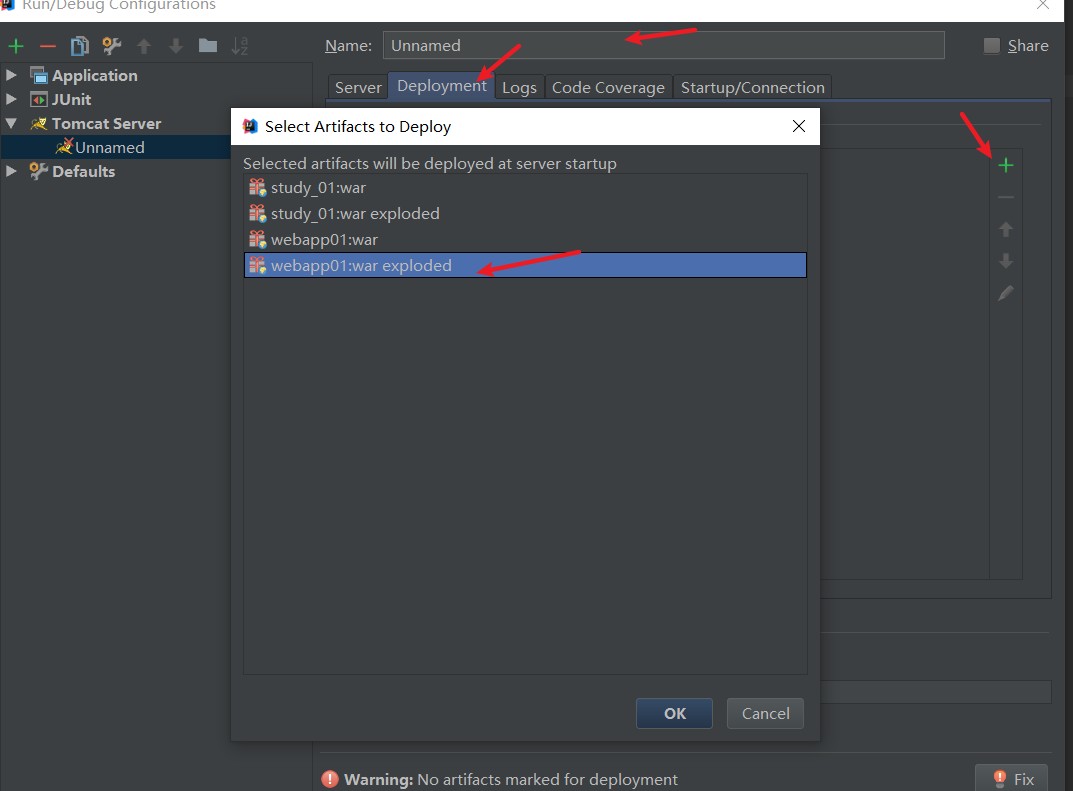
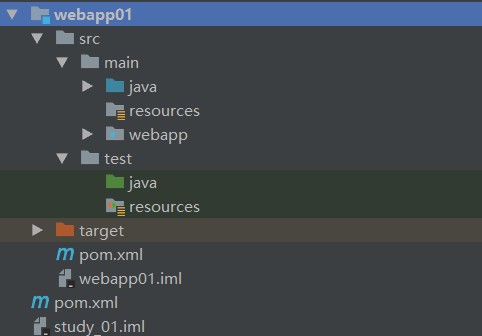
- 整体结构
- 运行即可
打包交付
- 双击打包

- 将打包后的war文件夹放到下面的文件夹中
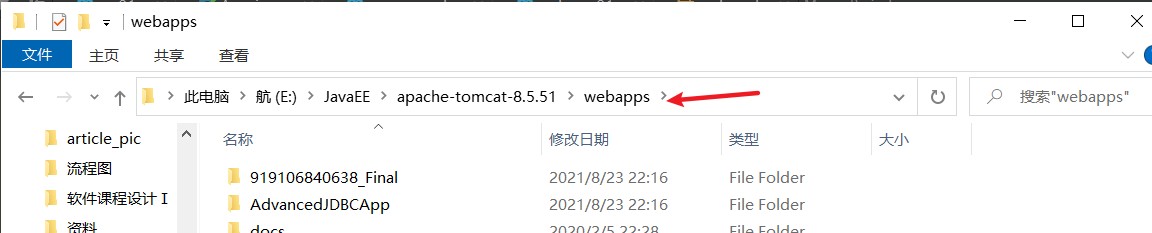
- 再进入下面路径选择启动

- 在浏览器运行路径即可
使用技巧
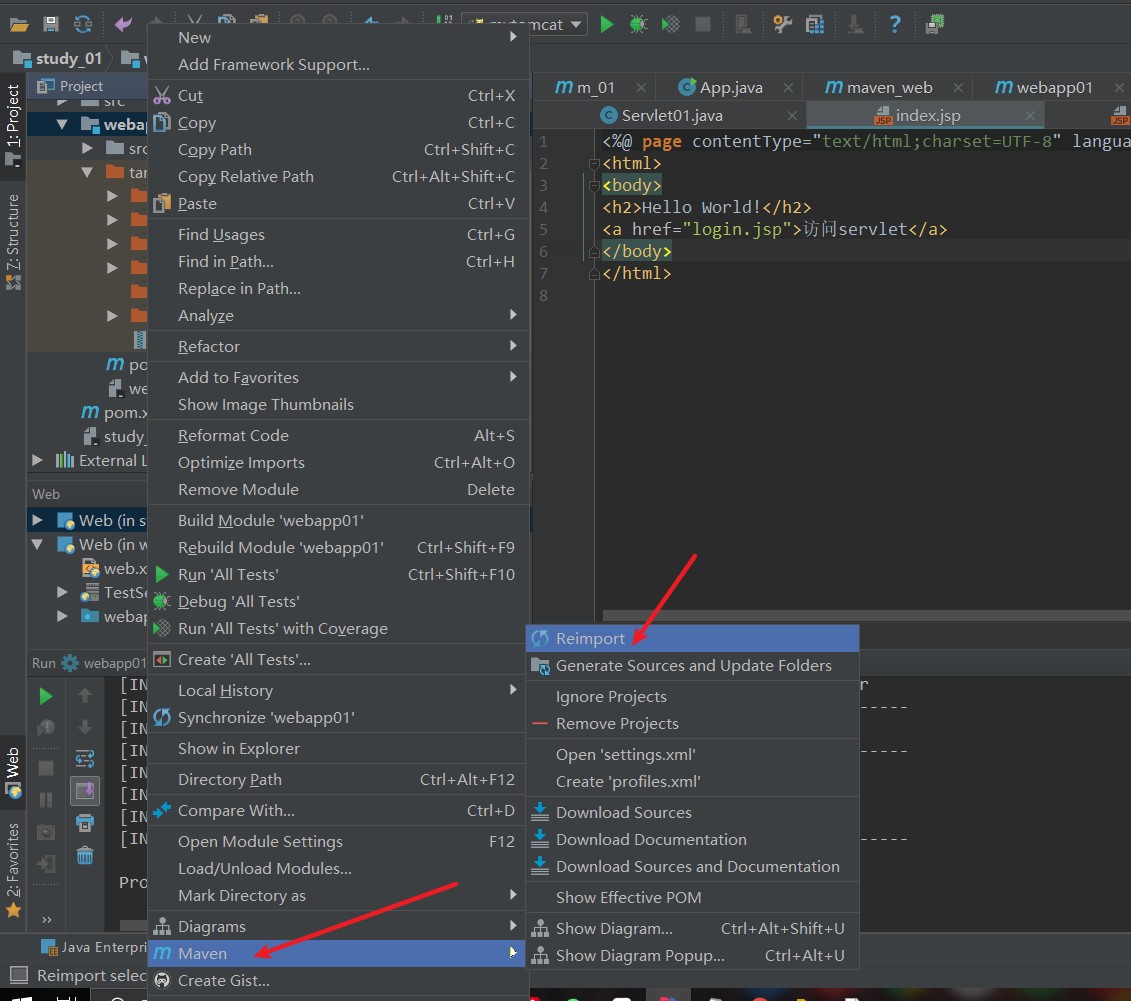
- 当导入依赖报错等情况,可使用下面操作进行刷新
- 当需要哪个框架时,去可以去官网找到依赖复制到pom.xml中,maven会自动下载
1 | <dependency> |
导入模块
- File—->Project Structure…
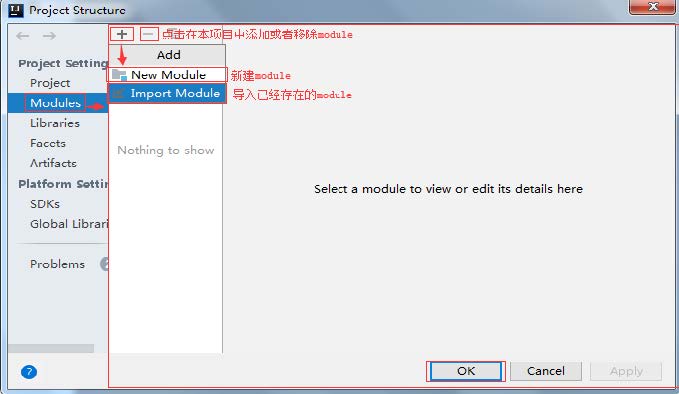
- 选择要导入的 Module
- 选择导入方式
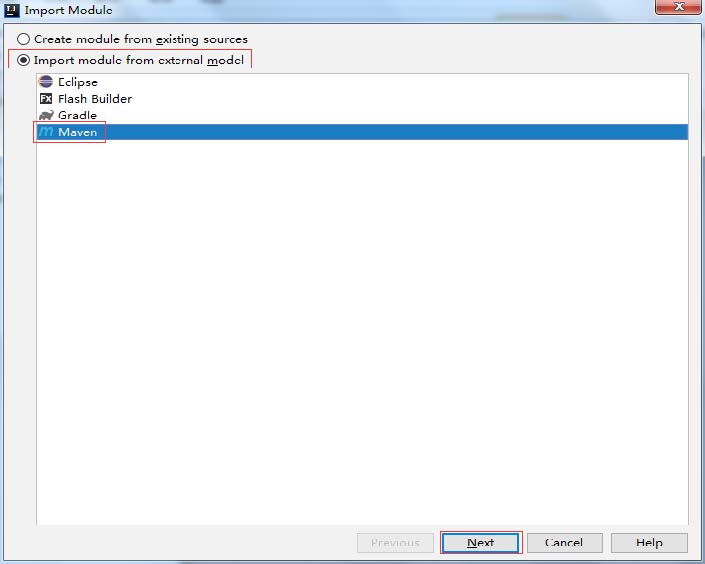
- 选择要导入的项目
- 选择要导入的 maven工程
- 设置导入 module所使用的 JDK
- 导入成功
依赖范围
scope的值有 compile, test, provided ,默认是compile
- scope:表示依赖使用的范围,也就是在maven构建项目的那些阶段中起作用。
- compile为全过程范围
- test为测试范围
- provided为编译测试过程,打包后不需要
指定资源位置
src/main/java和 src/test/java 这两个目录中的所有 *.java文件会分别在 comile和 test comiple阶段被编译,编
译结果分别放到了 target/classes和 targe/test classes目录中,但是这两个目录中的其他文件都会被忽略掉,如果需
要把 src目录下的文件包放到 target/classes目录,作为输出的 jar一部分。需要指定资源文件位置。 以下内容放到<buid>标签中。
1 | <build> |
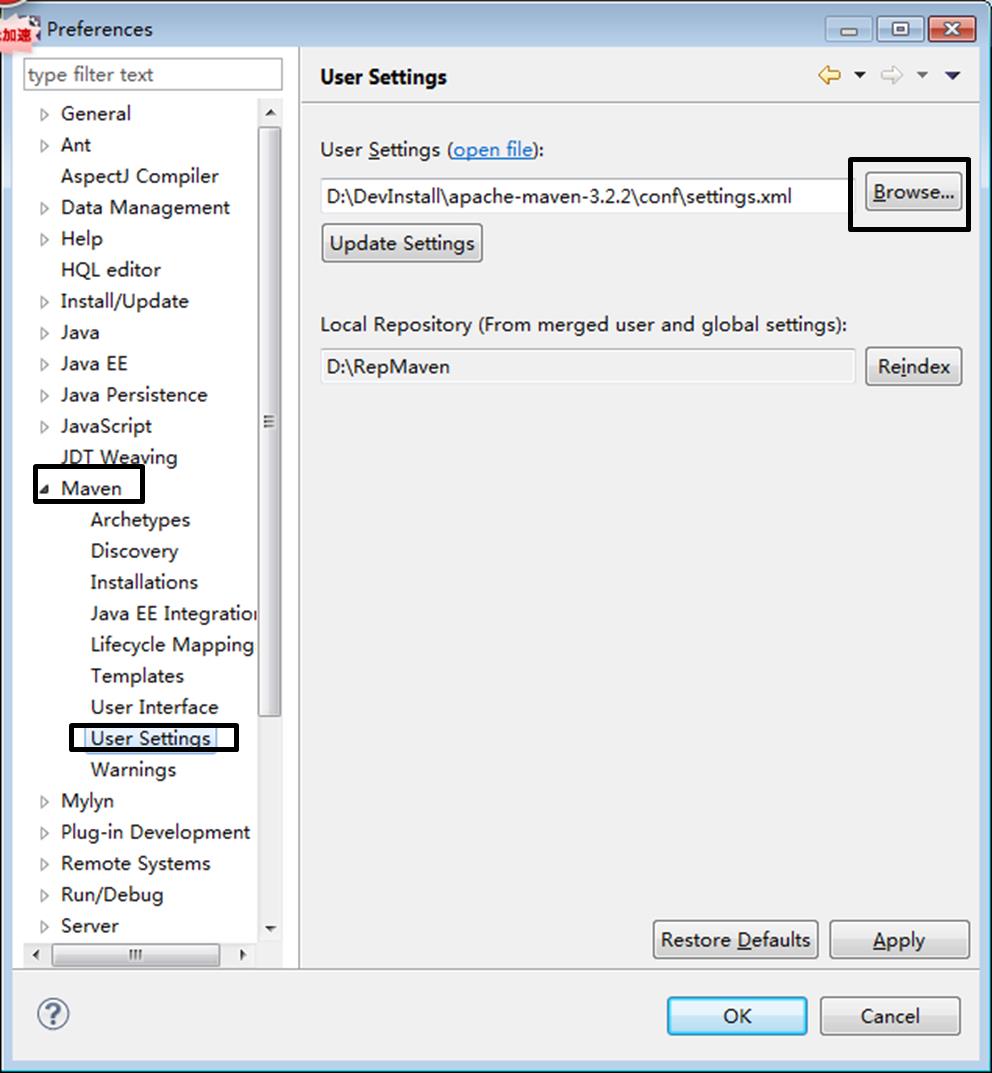
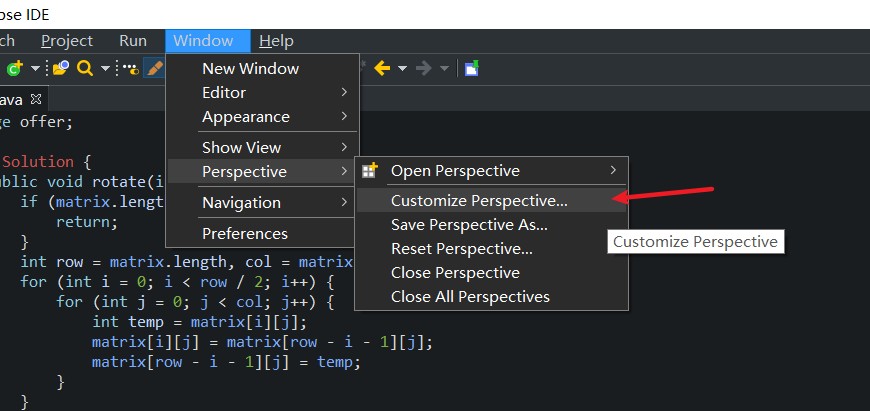
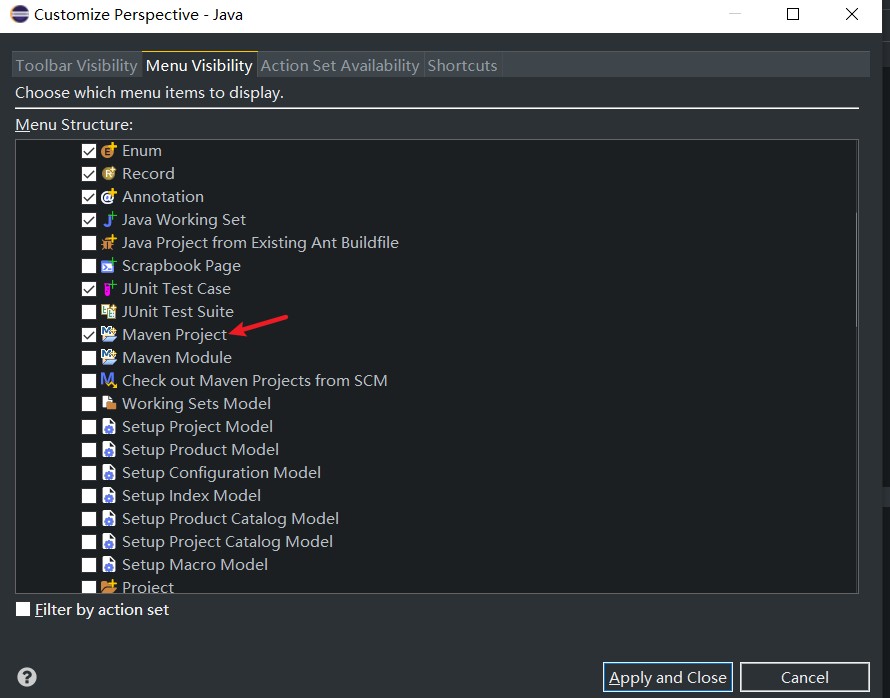
Eclipse中的Maven
在插件中引入下载的maven而避免使用自带的maven
修改setting.xml位置
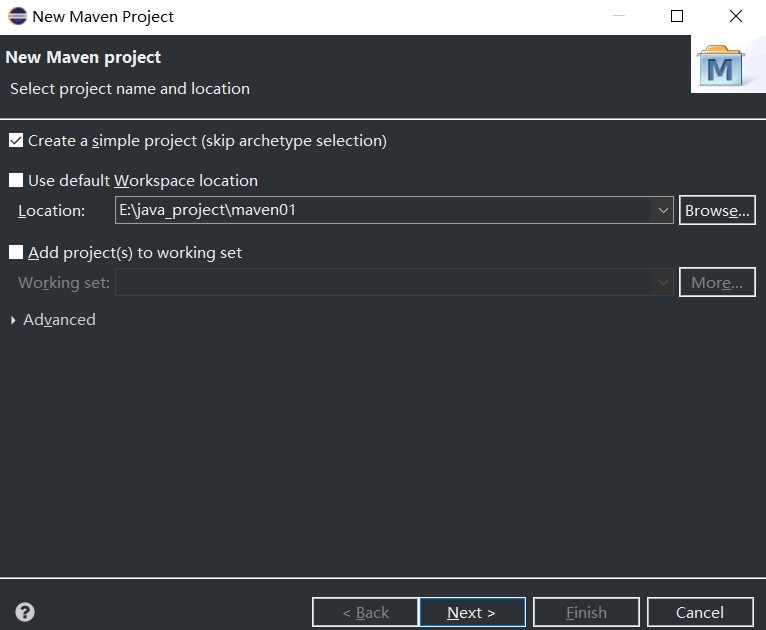
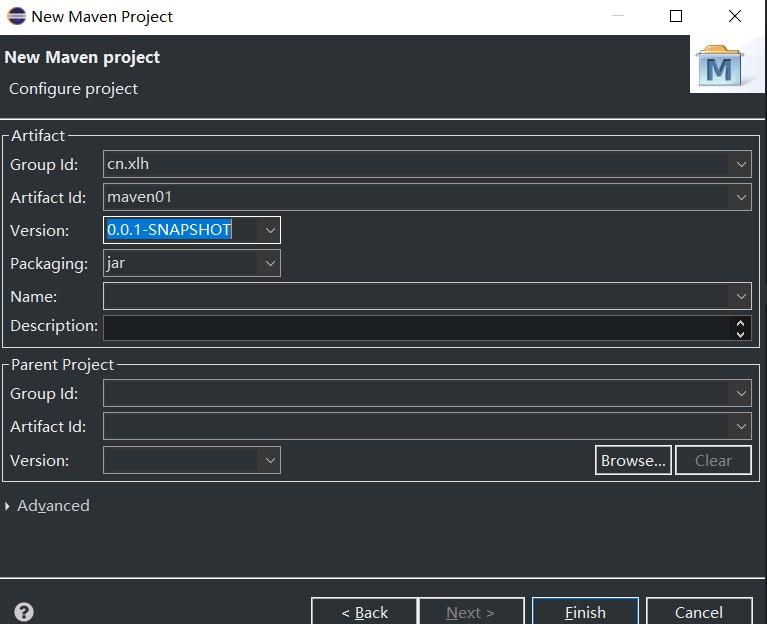
创建maven的java工程
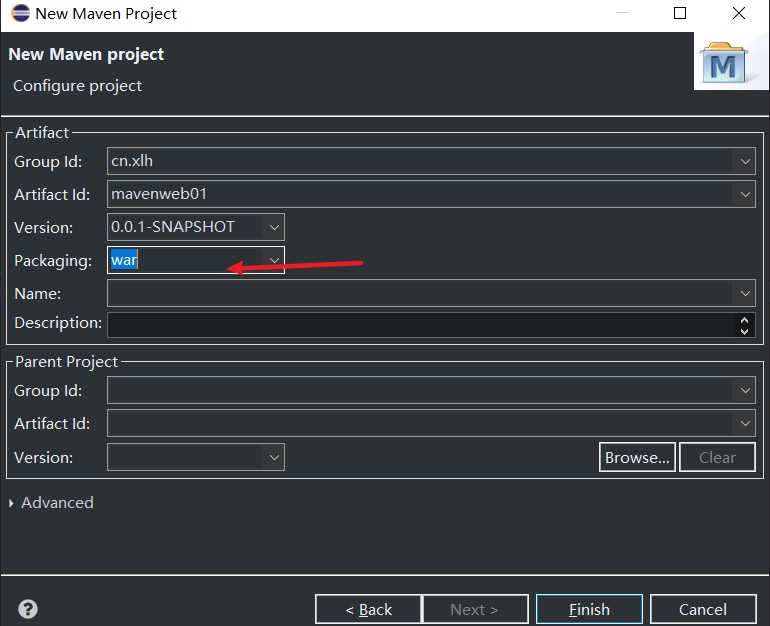
创建web工程
- 其他步骤相同,但在packing初有区别
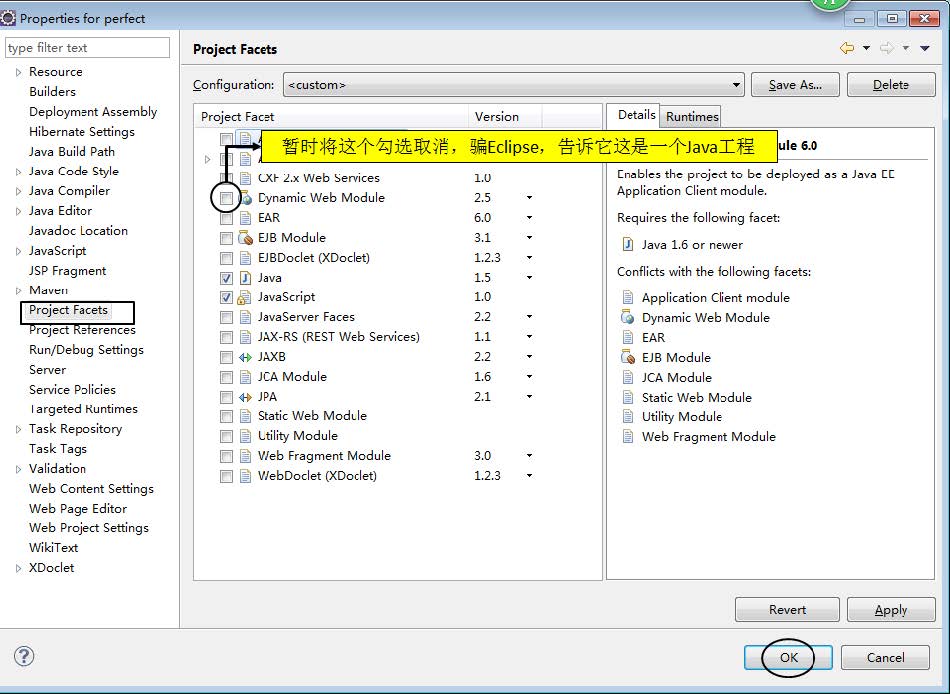
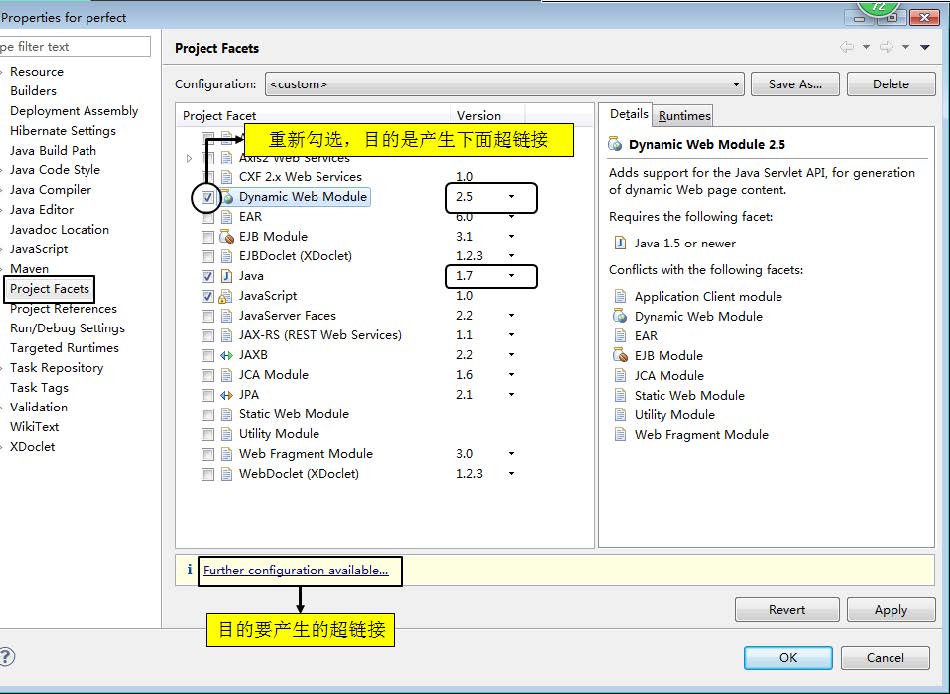
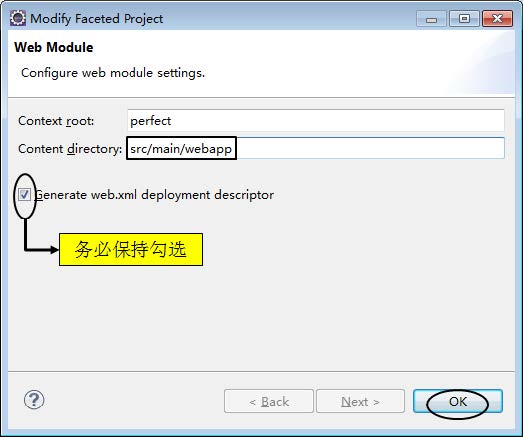
- 右击工程,选择
properties,找到project facts,如果没有,网上搜索下载包可添加
.jpg)
.jpg)
.jpg)
.jpg)
.jpg)
.jpg)
.jpg)
.jpg)
.jpg)
.jpg)
.jpg)